Import Users from Active Directory
You can use OneLogin’s Active Directory (AD) connector with real-time user synchronization to keep your AD user data up to date. You can also select different AD organization units (OUs) stored in AD connectors and import the data into your OneLogin account.
Before you can import AD data to OneLogin, you must verify your AD connection and install at least one Active Directory Connector.
Verify your Active Directory connection
Log in to your OneLogin account as an Administrator.
Click Administration on the toolbar to go to the Admin panel.
Go to Users > Directories and select Active Directory to open the Active Directory Connector Setup wizard. Follow the instructions to download the setup wizard installer and complete the setup process.
On the Connector Instances tab, verify that the Active Directory Connector instance is successfully connected.
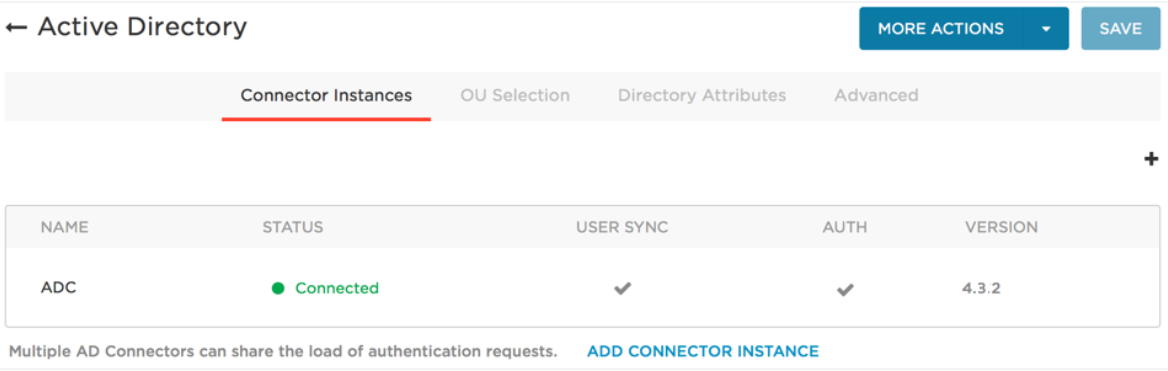
If your connection is successful, the Status is Connected and appears green. If you installed a single AD Connector instance for this domain, both User Sync and Auth are checked.
For additional AD Connector instances on the same Active Directory domain, only Auth is checked.
Select Organizational Units to sync from AD to OneLogin
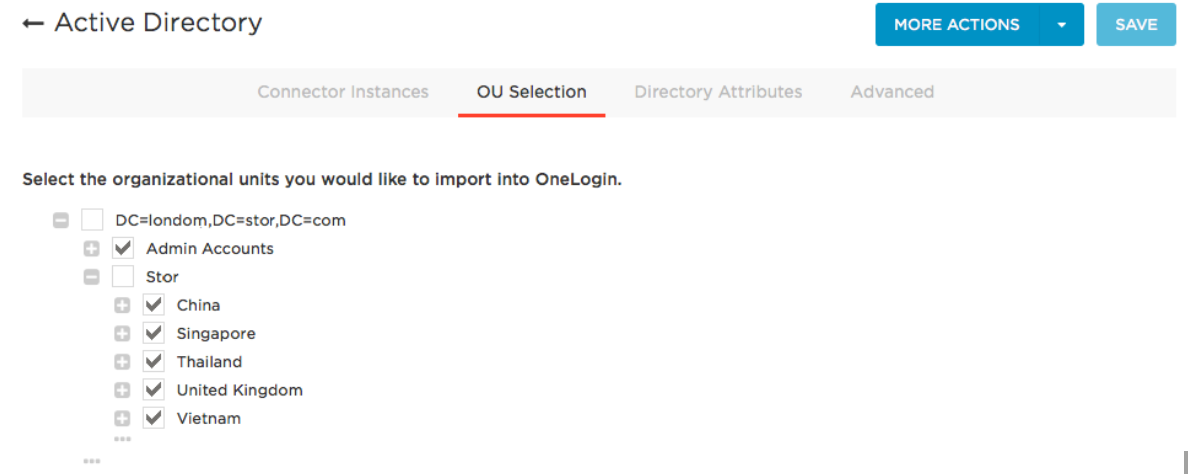
Go to the OU Selection tab.
Select the AD organizational units to import into OneLogin.
The tab displays your domain's Base DN in the format DC=yourcompany, DC=com.

Expand the tree by selecting the plus ![]() button to show selected nodes.
button to show selected nodes.
The first time you open the tab, only the top level node is displayed. After you select OUs and save, the tree expands to display only the branches and nodes that include selected OUs.
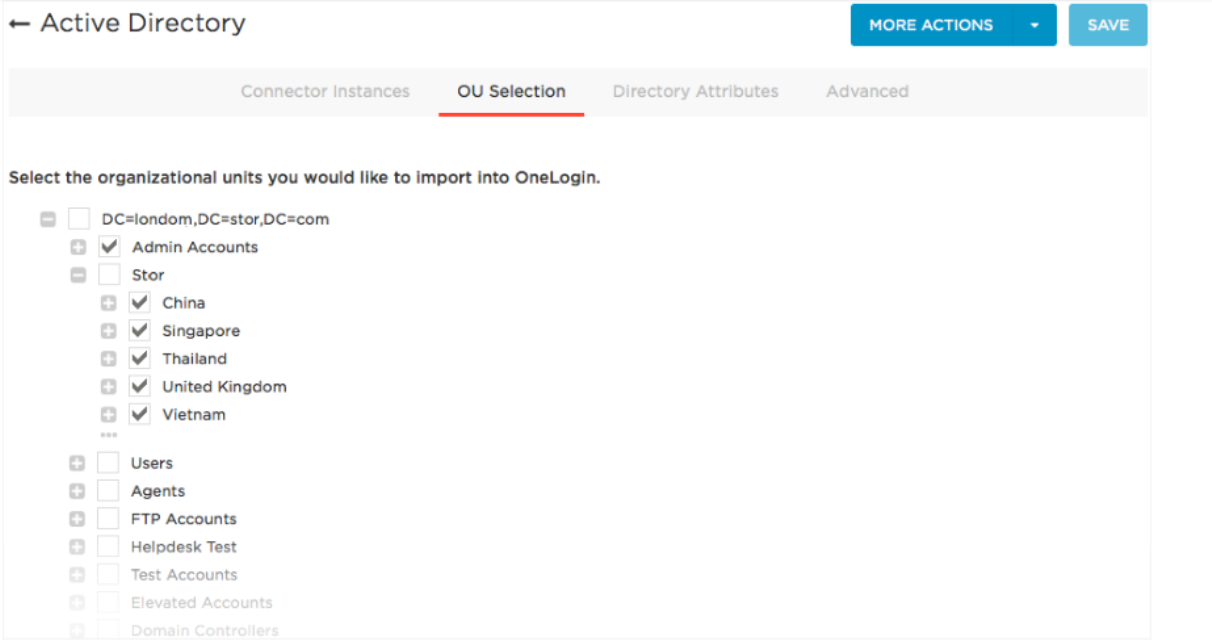
To view child nodes, click the plus ![]() button to expand the node. To
view sibling nodes, click the ellipsis
button to expand the node. To
view sibling nodes, click the ellipsis  button.
The following image displays the default tree view.
The screenshot below shows the same tree, expanded after clicking the
bottom ellipsis button (in line with the Stor node). Note, all of
the siblings of the Stor node are now displayed.
If you’ve been using OneLogin’s free 30-day trial, click here to learn how to buy OneLogin.